Stepwise Product Guide - Working Preview
-
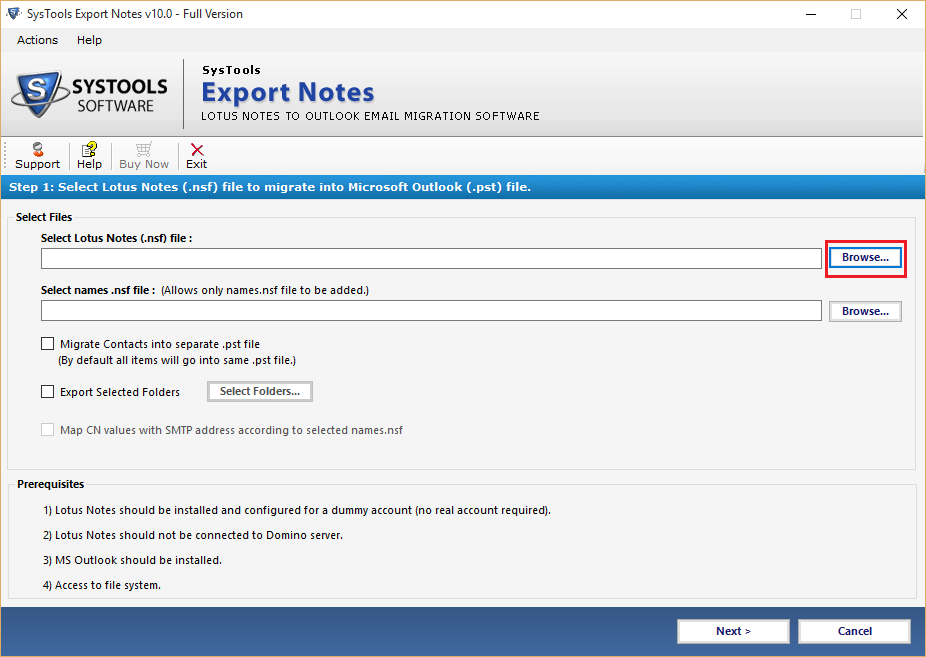
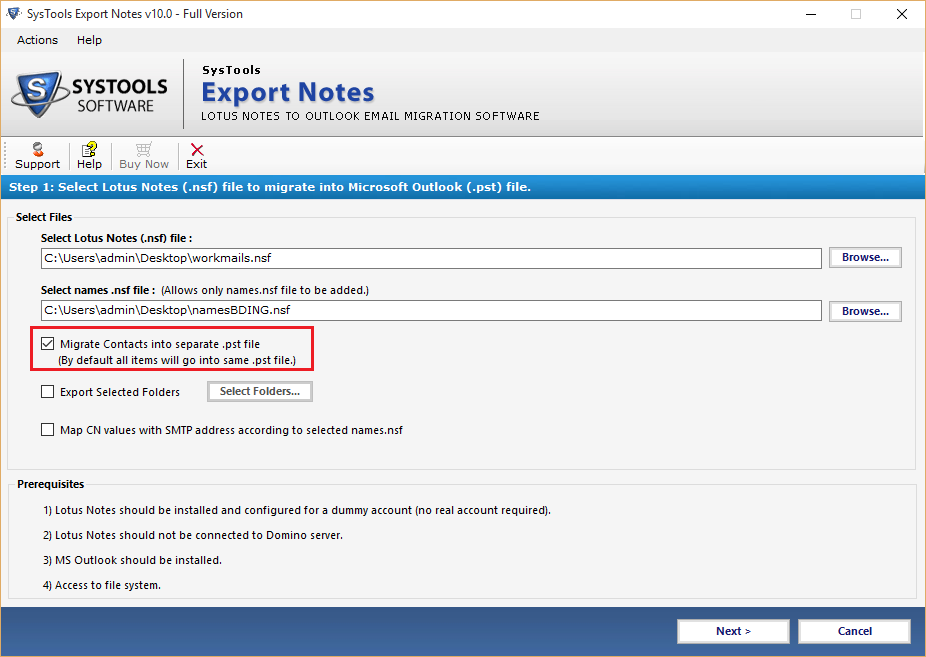
Click on the Application icon and launch the software for migration process. Screen provides Two options to convert NSF files. First select the NSF database file(*.nsf) and second select the Names.nsf file of contacts. Click on Browse button in order to locate the NSF file needed for the conversion:
-
After selecting the Lotus Notes database file, click on Open button:
-
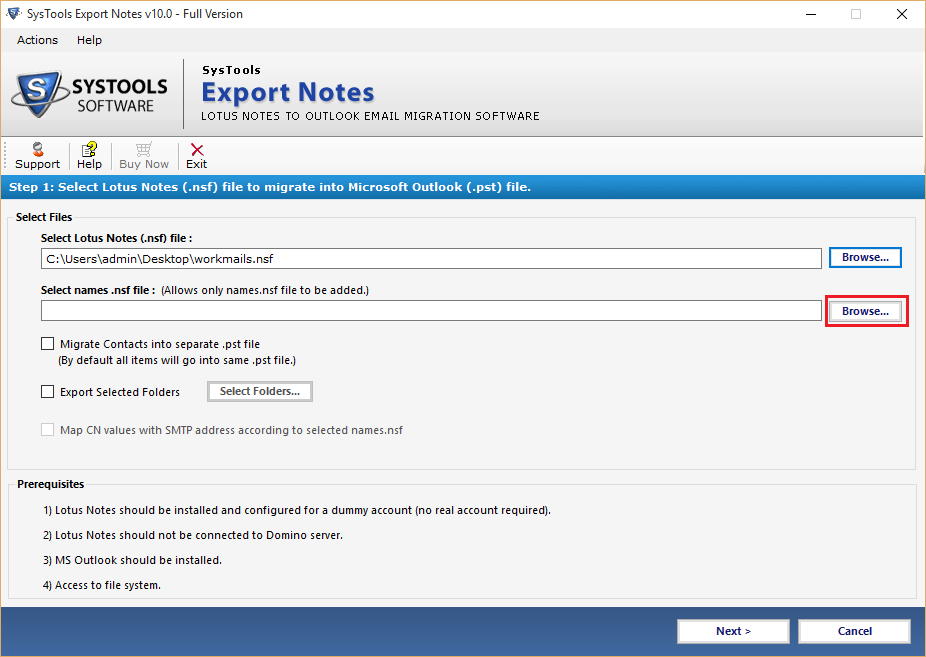
For names.nsf file conversion, click on second Browse button which allows converting only Lotus Notes Address Book:
-
Choose the names.nsf file from the saved location and click on Open button:
-
Check the option Migrate Contacts into Separate PST otherwise software add the contacts of names.nsf file into same PST:
-
By using the Export Selected Folders option, choose the existing folder which you want to migrate into PST and uncheck the rest folders. After setting the changes click on Apply button:

-
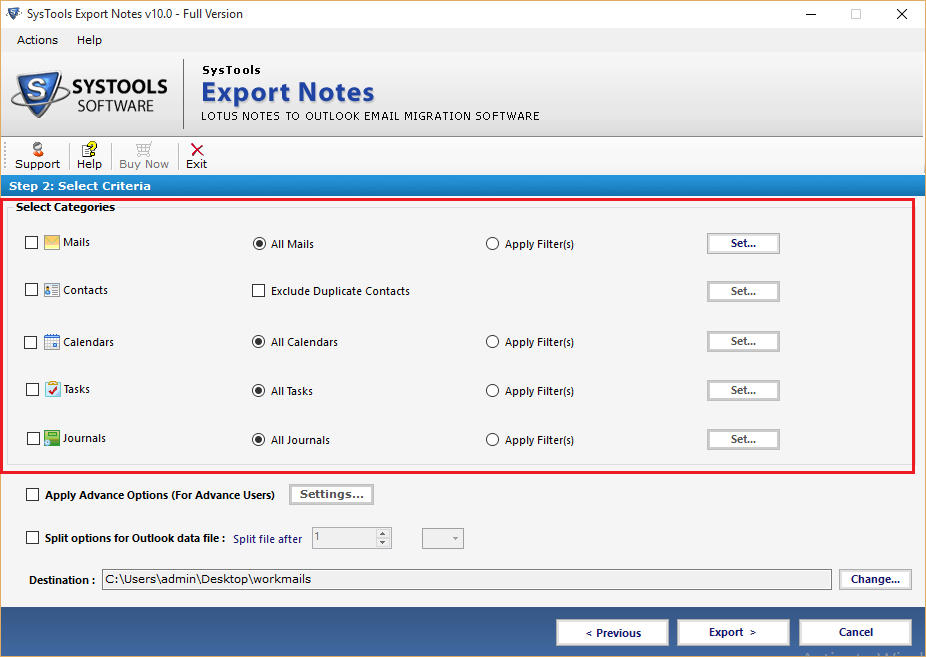
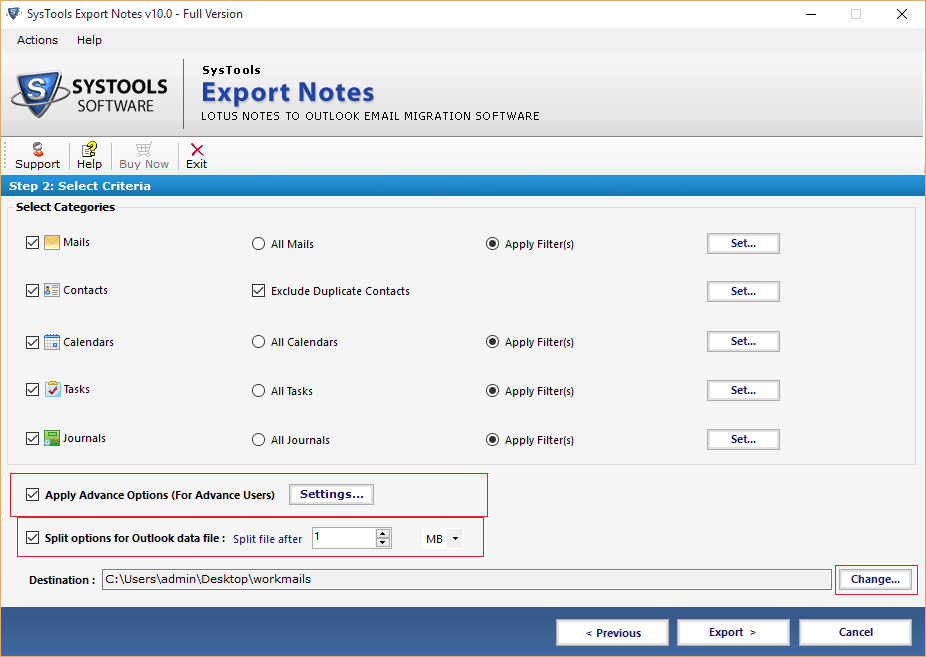
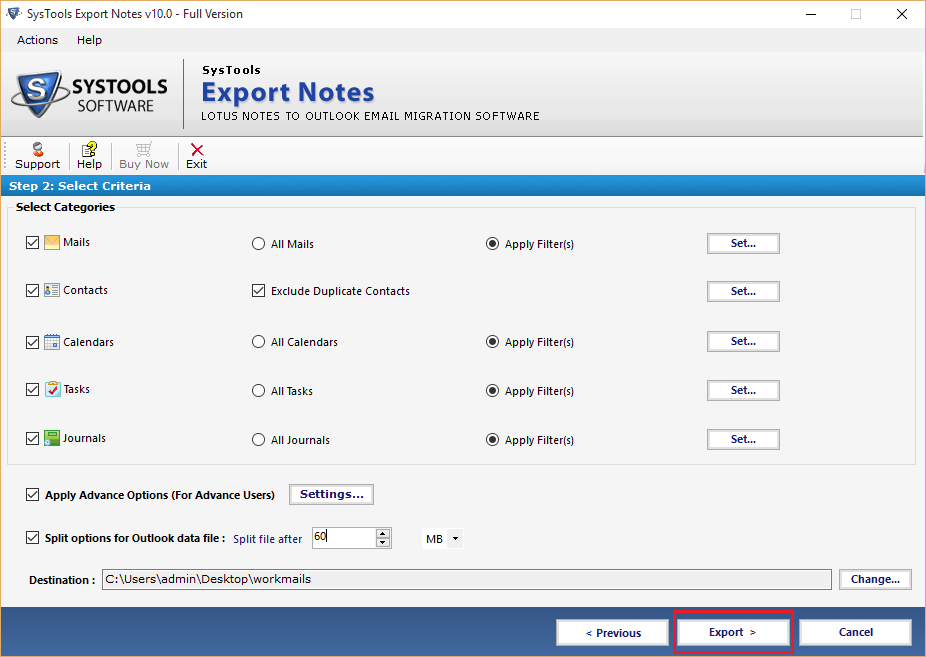
For specific date range migration of Lotus Notes Emails, Calendars, Journals and tasks Apply Filter option in front of the category:
-
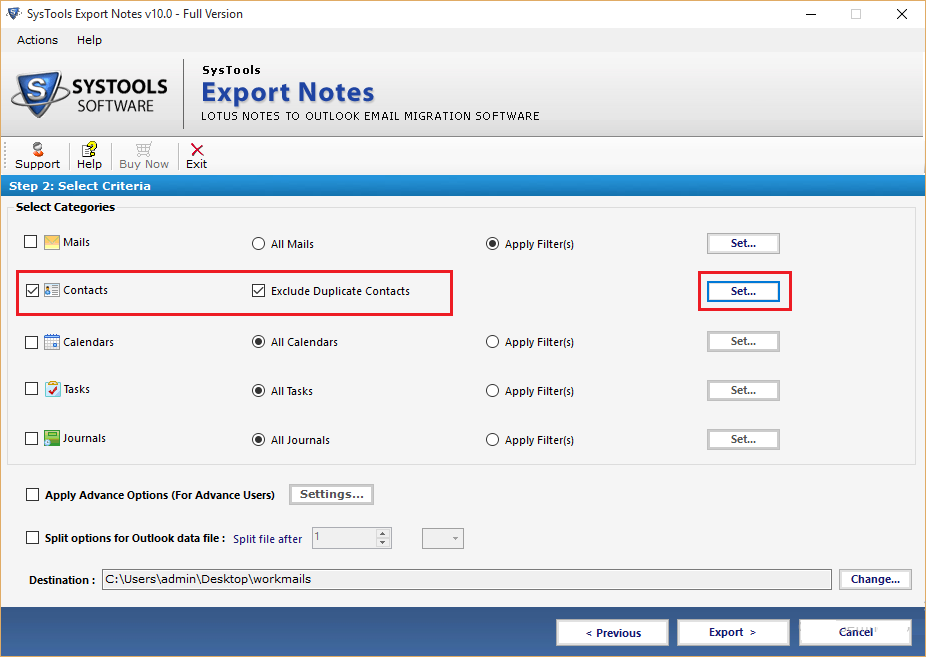
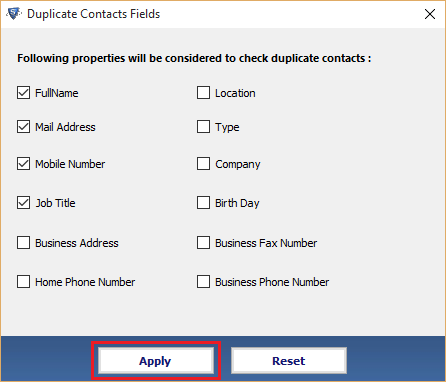
To restrict the duplicate contacts from migration to PST choose the option Exclude Duplicate Contacts:
-
Check the contact properties to filter out the Lotus Notes unique contacts:
-
Apply the Advance Setting according to the migration need and the make conversion more effective and easy:
-
In first tab of advance setting check the options to hold the HTML formatting, Internet Header, Doclinks and convert encrypted NSF mails and All Document folders at once:
-
Second tab allow mapping the Lotus Notes Canonical values to SMTP email address. Add numerous CN names into CSV file and import it to map:
-
With Custom Folder Mapping option, map Lotus Notes system defined folder into various (new or existing) Outlook folders:
-
Splitting Outlook Data file, Software provides facility to break the Output PST file into smaller size (MB and GB) of PST file:

-
After applying the entire required advance setting for the conversion, click on Export button:
-
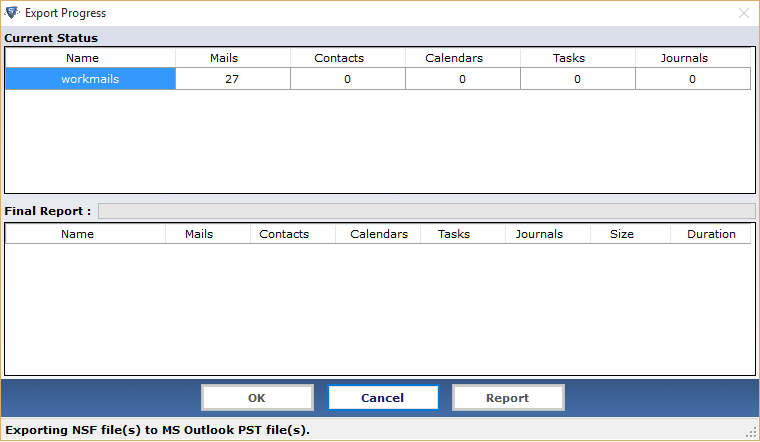
Get the current statics of conversion process and the status of each folder after complete conversion process: