How Software works ?
- Download & Run the Upload MBOX to Office 365 software.

-
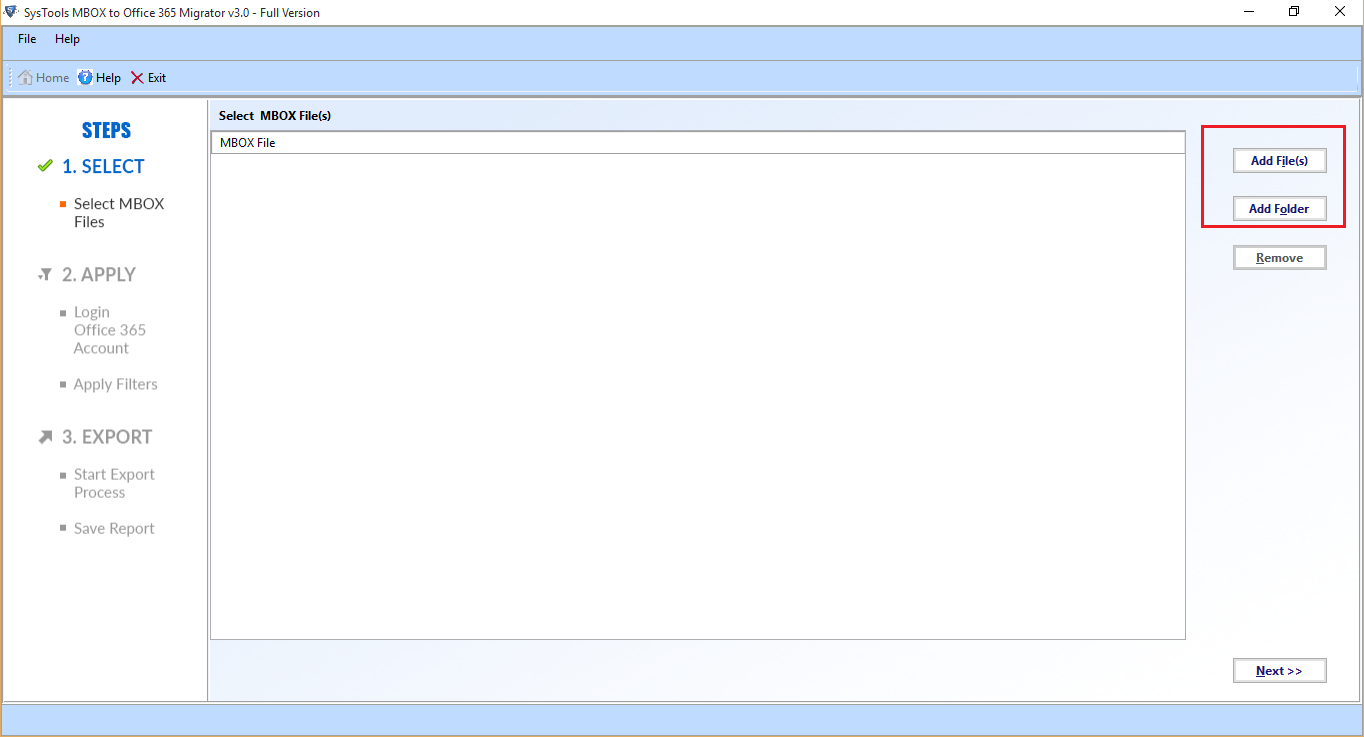
To Browse the MBOX File:
Add File(s): Click on this option to separately browse each mbox files.
Add Folder: Select this option to add multiple mbox files at once.
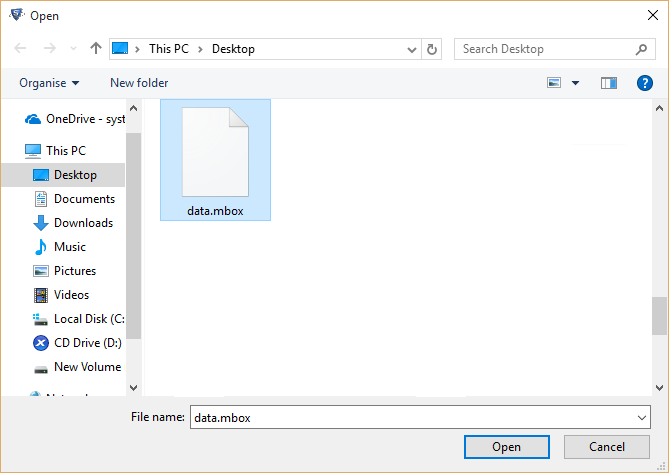
- Browse for the location of MBOX file and click on Open.
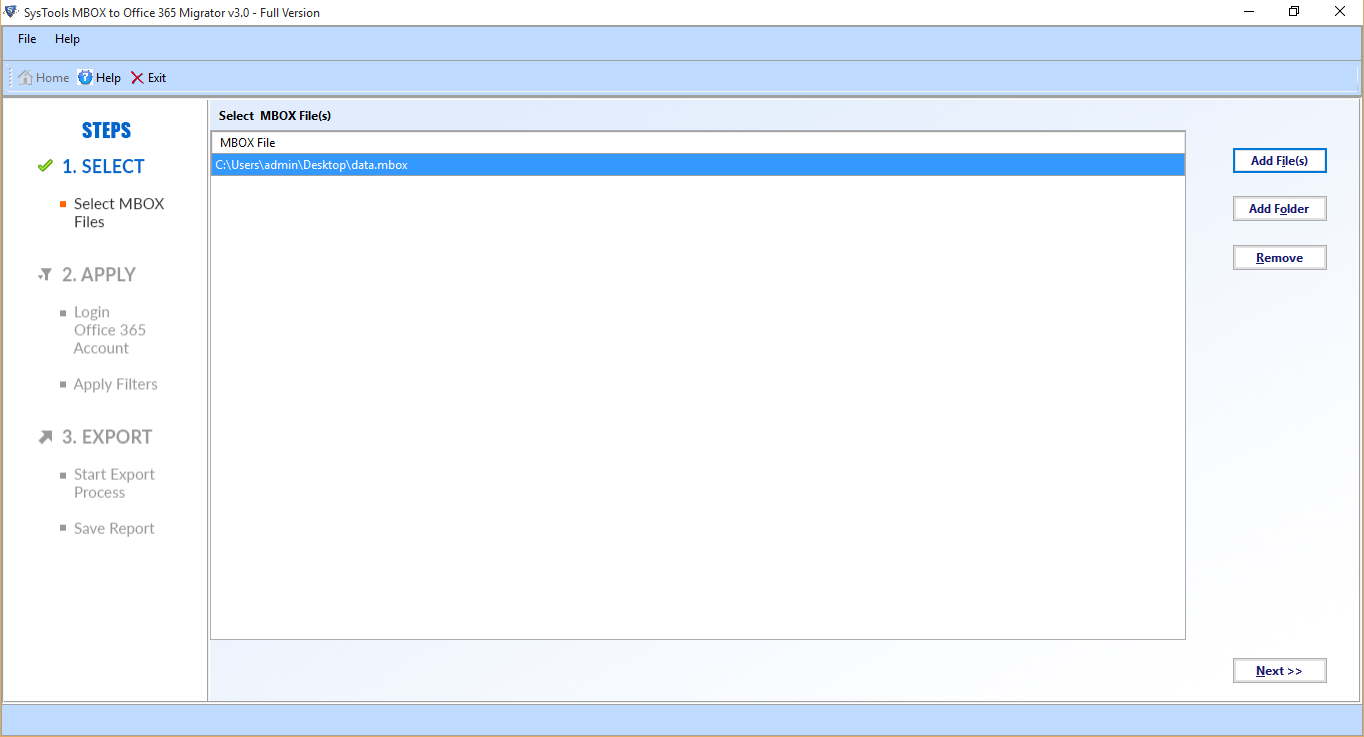
- All added files will be seen in the below screen. Click on Next.
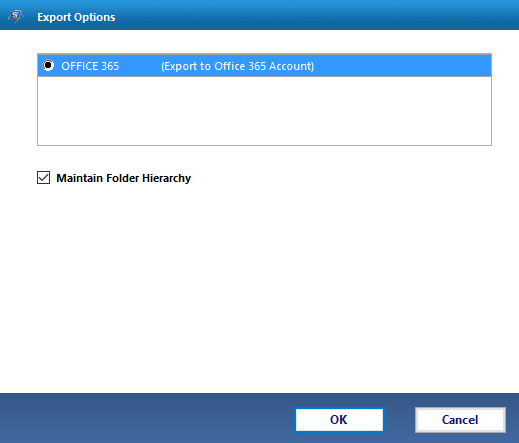
- Now in next you will see the export options Office 365 radio button select it and click on OK.
-
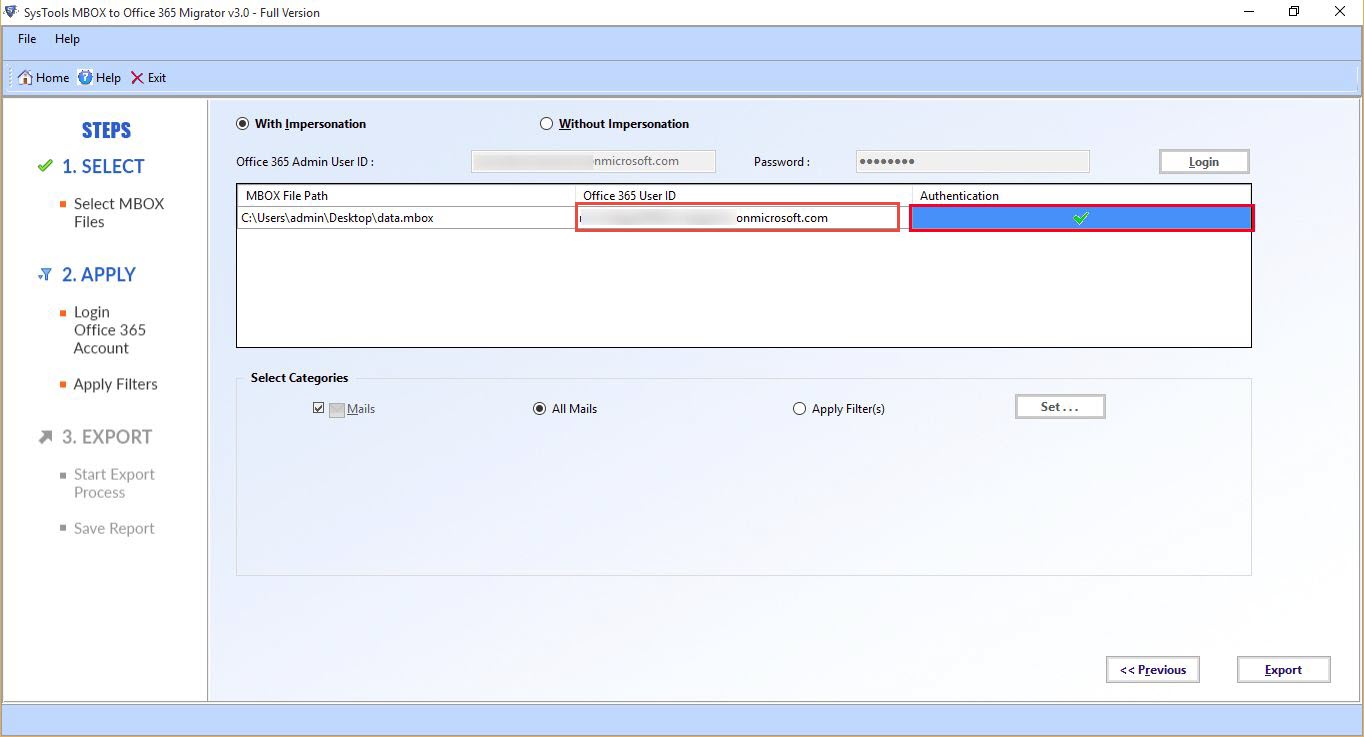
1. With Impersonation
Enter the credentials of administrator account, provide admin id and password and click on Login. Then the software will validate the admin account credentials.
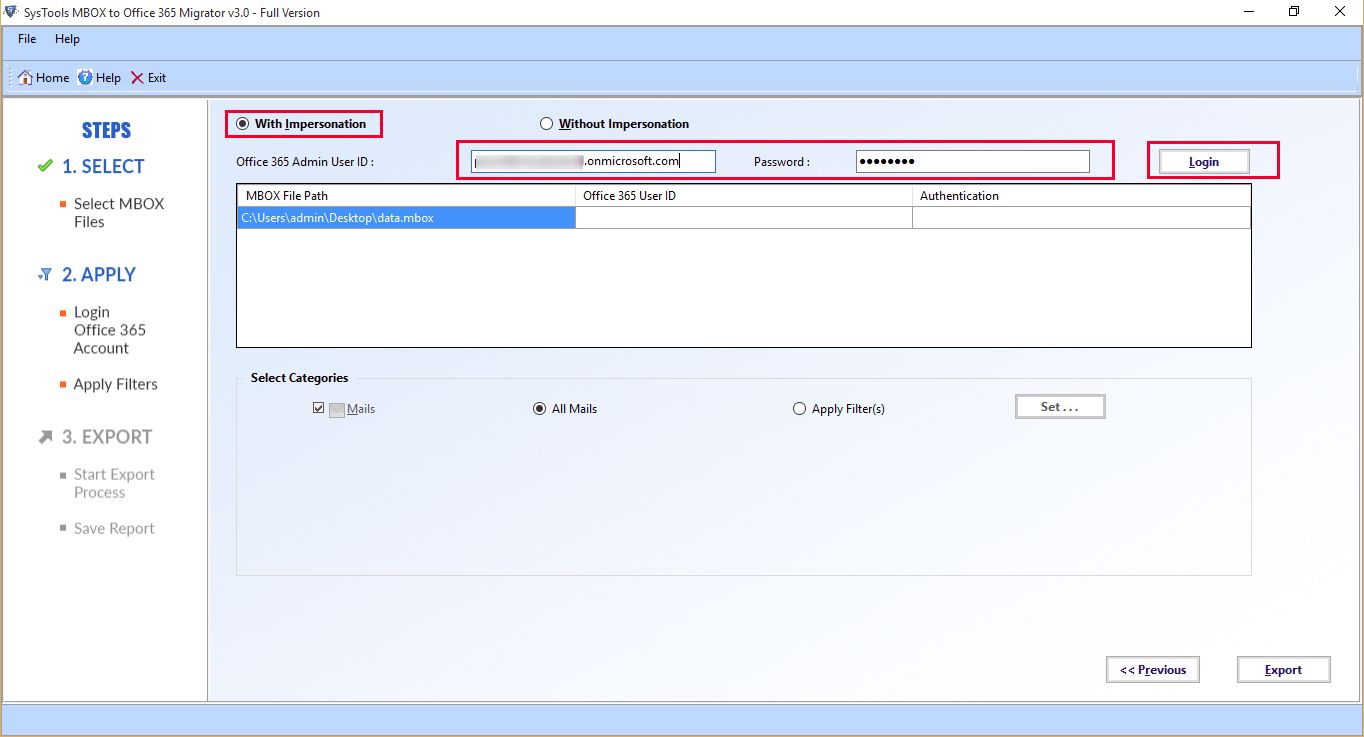
- In next step, provide the mailbox id in which you want to migrate mbox files. The tool will authenticate the details provided.
- 2.Without Impersonation
Provide the user account details i.e mailbox id and password. The tool will validate the account credentials.
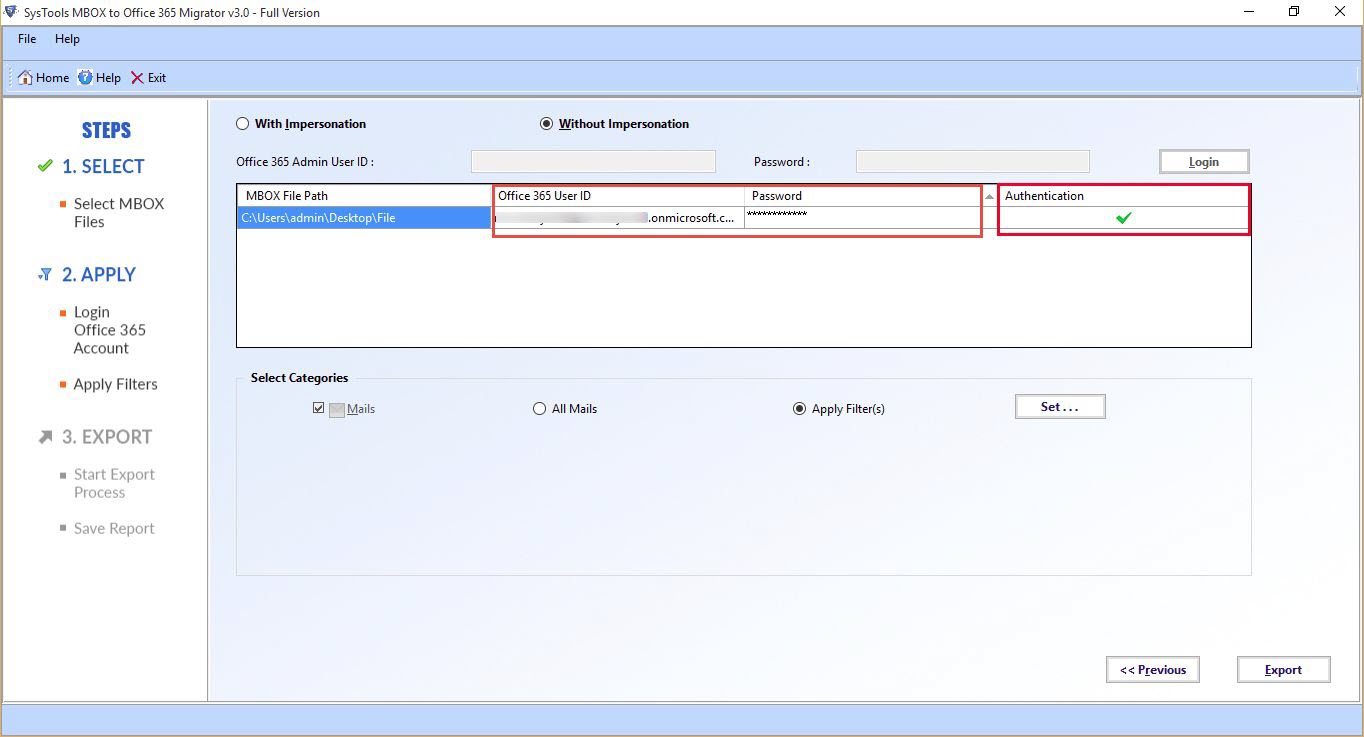
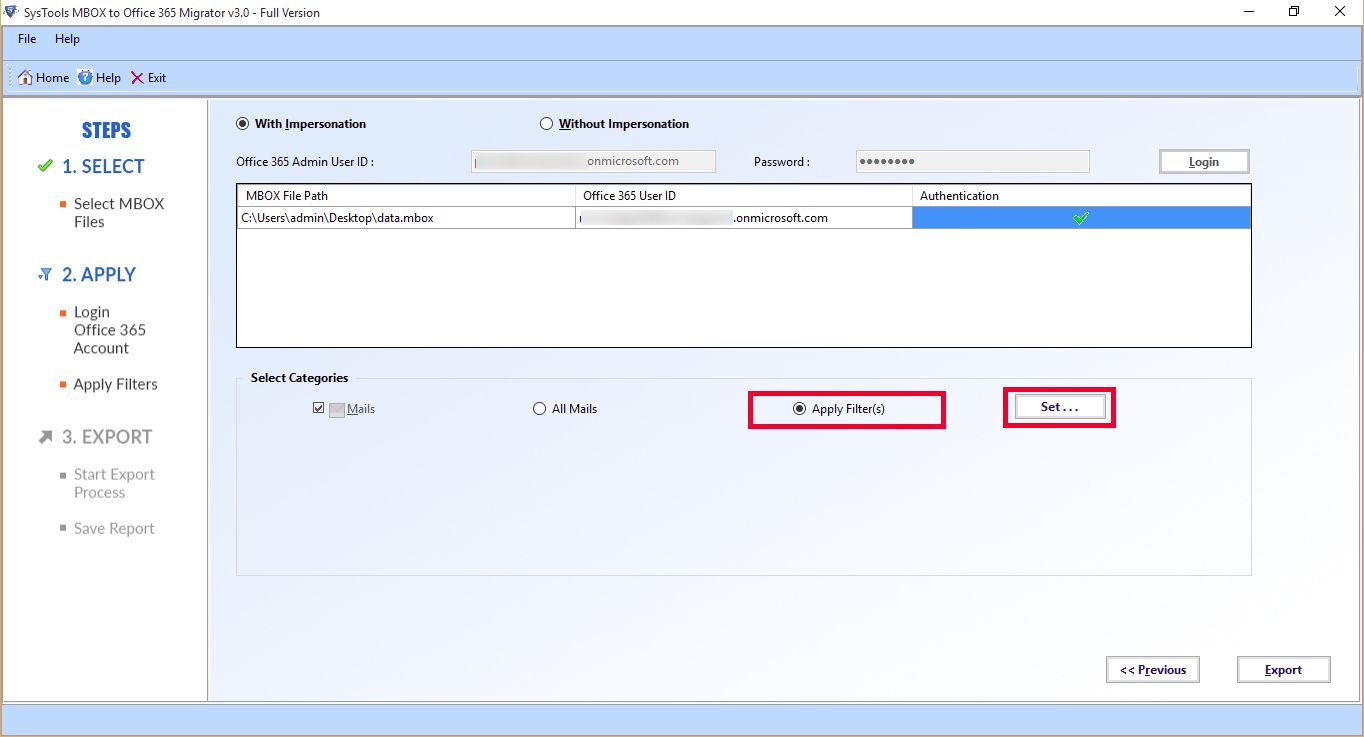
- Users can apply filters to import specific data. Click on Apply Filter(s) and click on set.
- Provide the date range and click on include date to move only date specified date. Click on Apply.

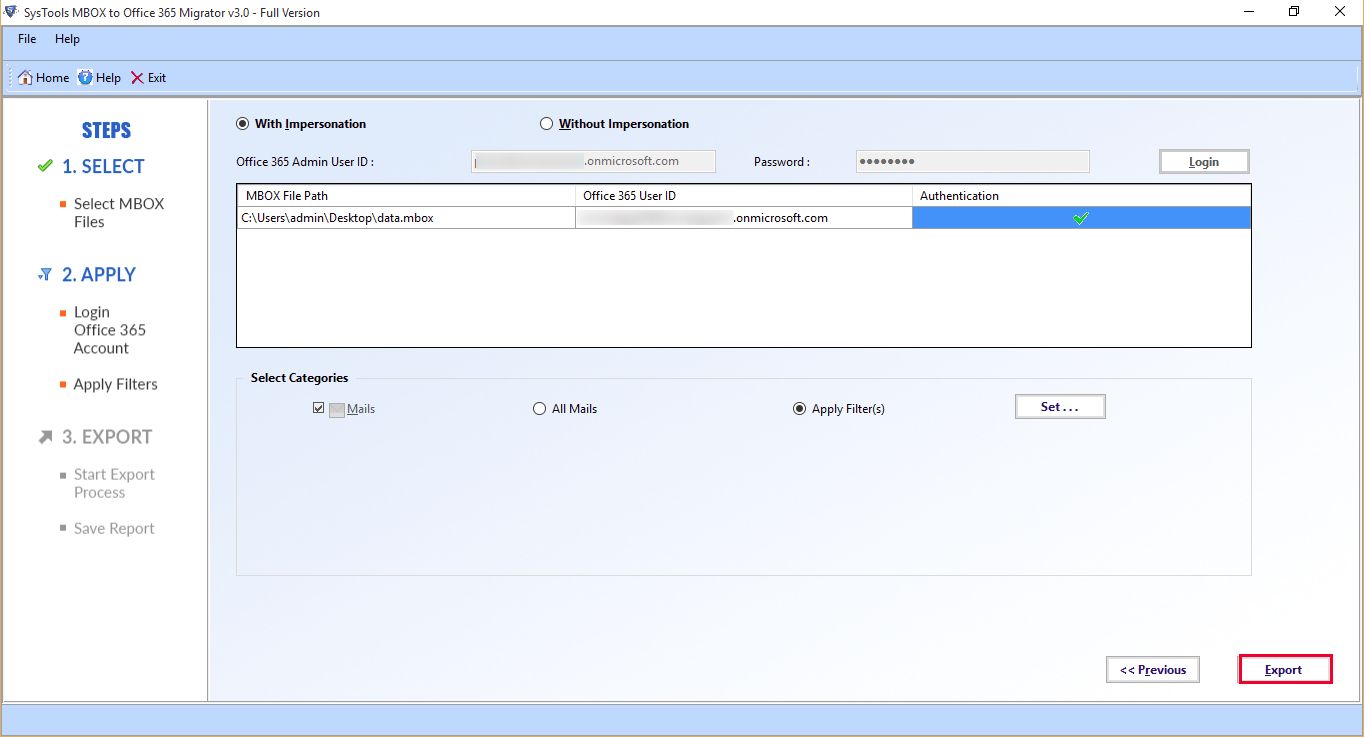
- To start the process, click on Export button.
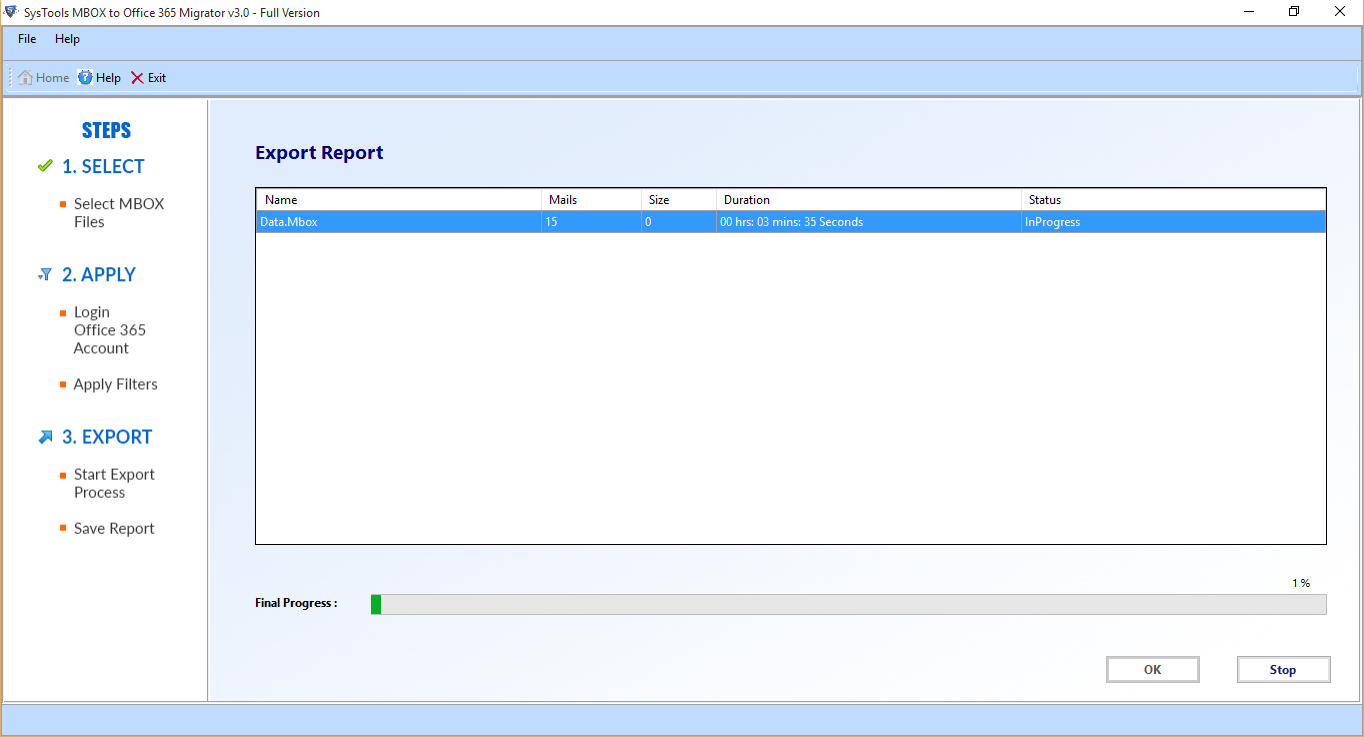
- The progress report of export process can be seen in below screenshot.
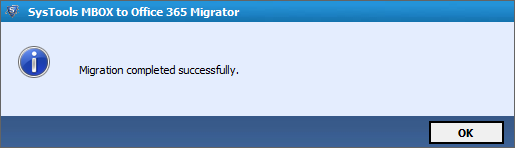
- After complete export process, a message will appear for exported successfully. Export report can also be saved.
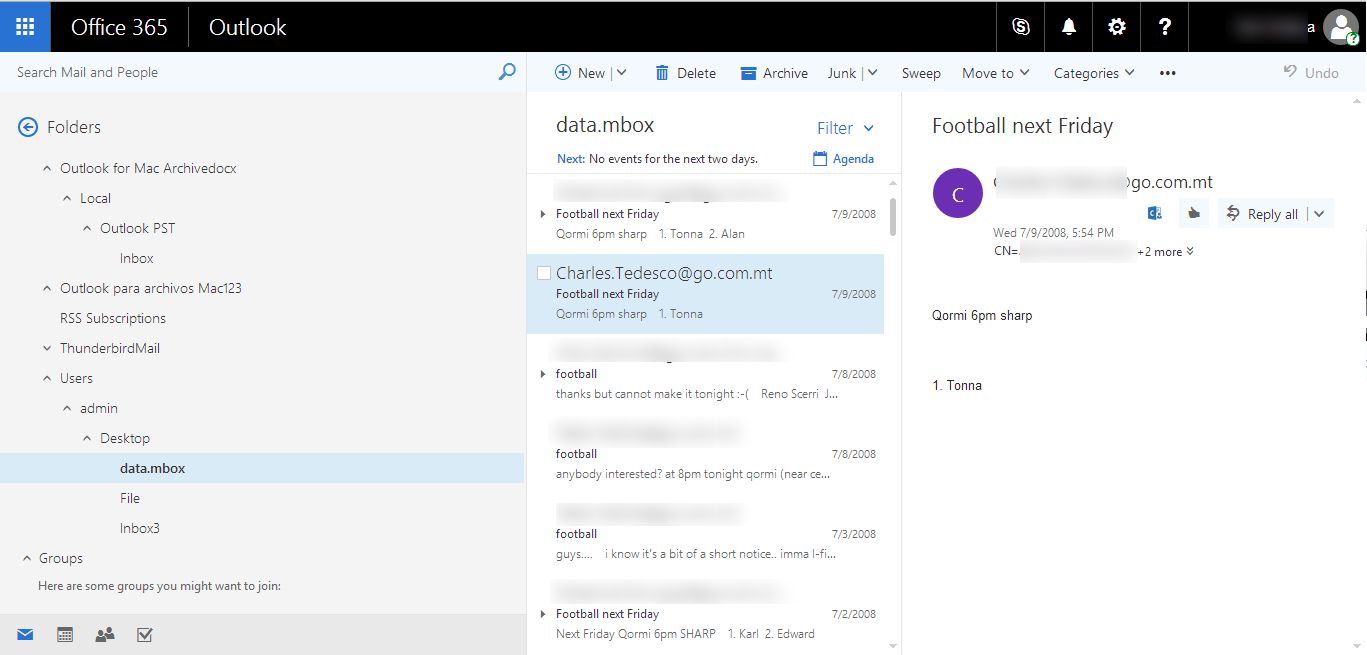
- All imported files can be seen in your office 365 account.