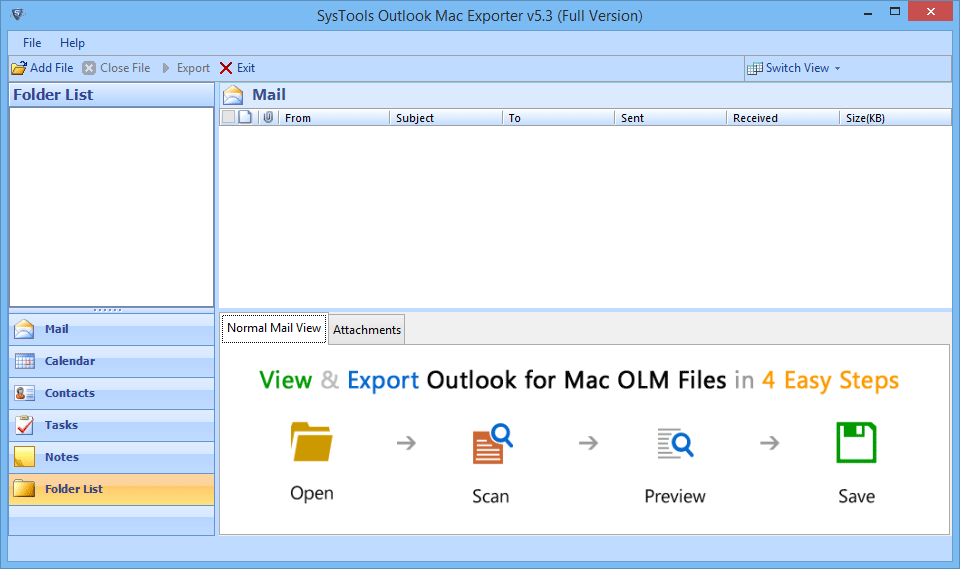
Know the working of tool
- Download, Install and Run the OLM file converter software.
-
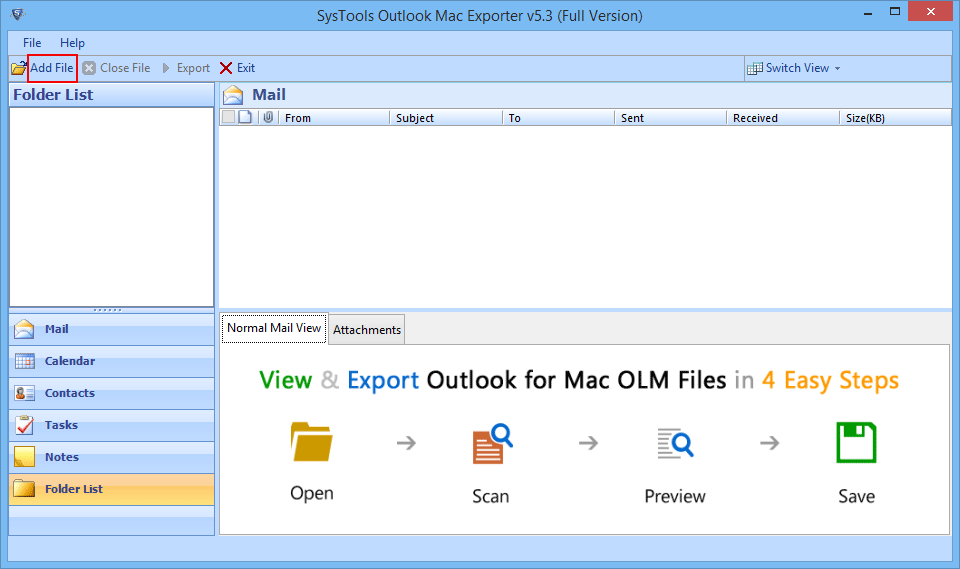
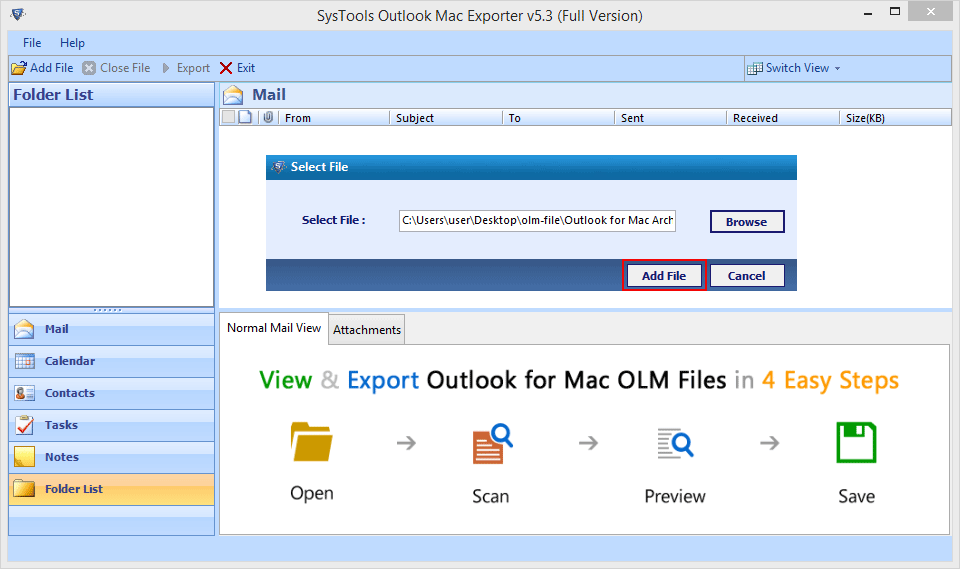
Click on Add file button to add the .olm file for conversion.
- Click on Browse for selecting the location to save the converted file.
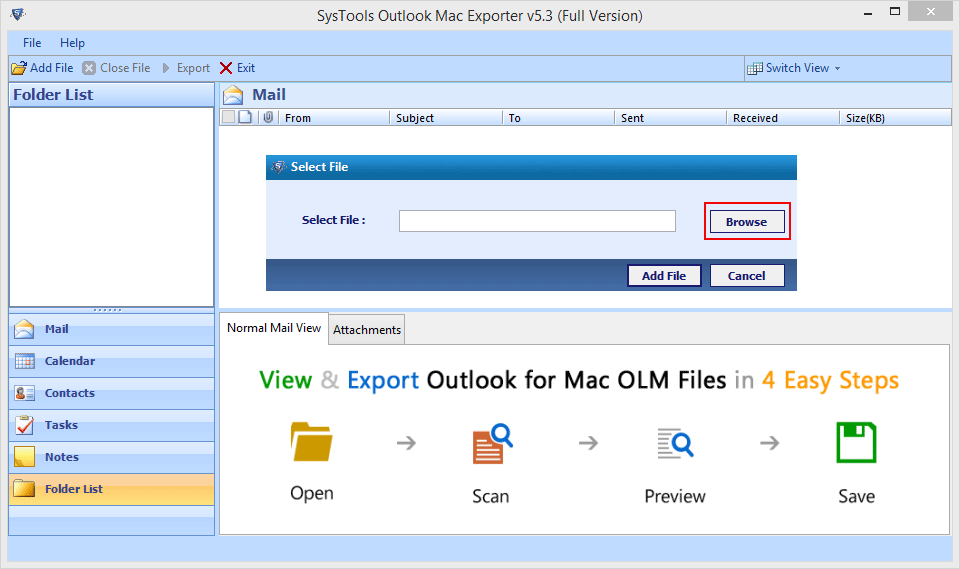
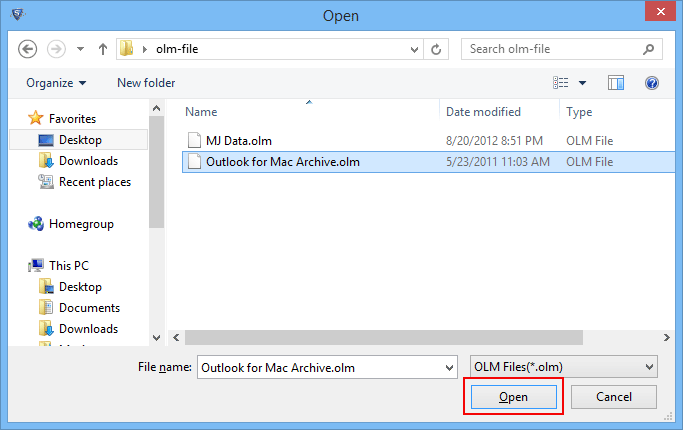
- Go to the location of OLM file in your local machine and click on Open.
-
Add the browsed olm file to the software by clicking on Add file.
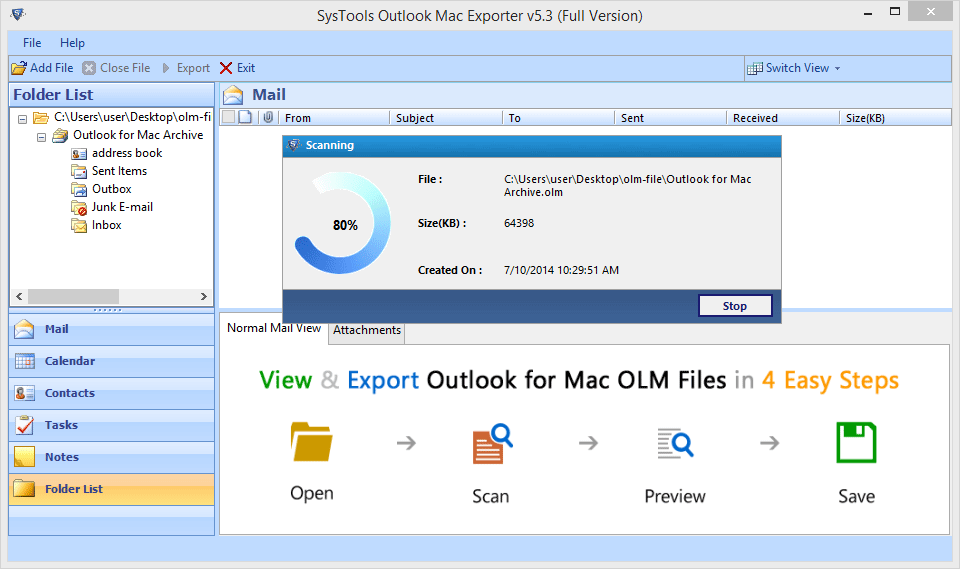
- Software will start the scanning of added OLM file displaying the progress details and also shows file name, size and created date.
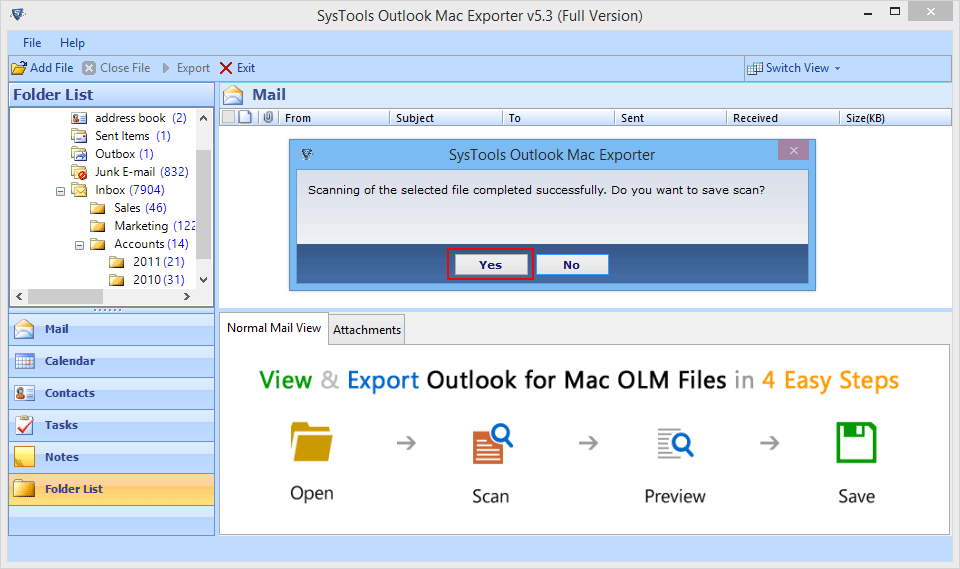
- After complete scanning of OLM file, it will ask for saving the scan. To save click on Yes otherwise chosose No.
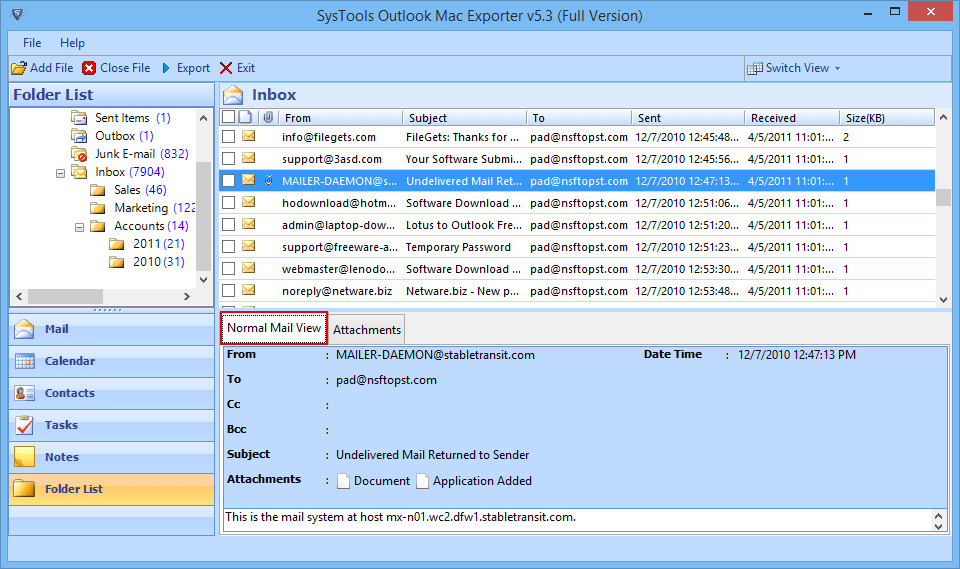
- After scanning of olm file, you can preview the Emails in Normal Mail view showing all header details( From, To, Cc, Bcc, Subject).
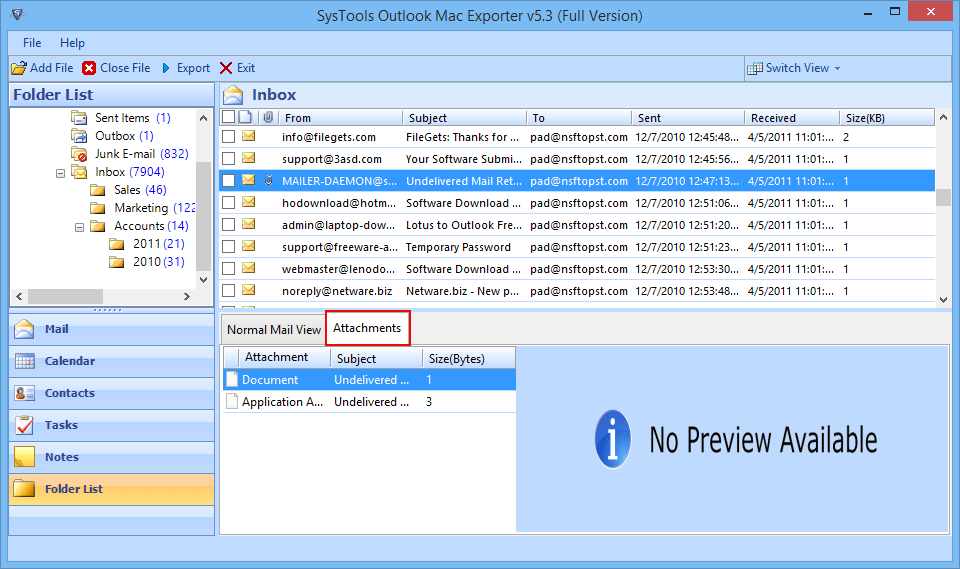
- Get the Preview of Attachments of emails by clicking on Attachment tab.
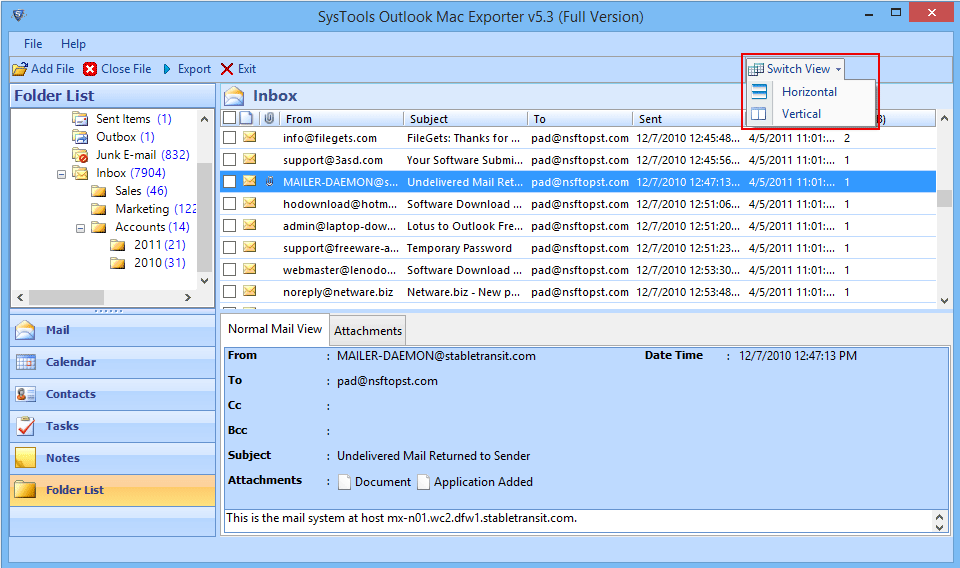
- Screen view can be changed anytime from horizontal or Vertical view mode.
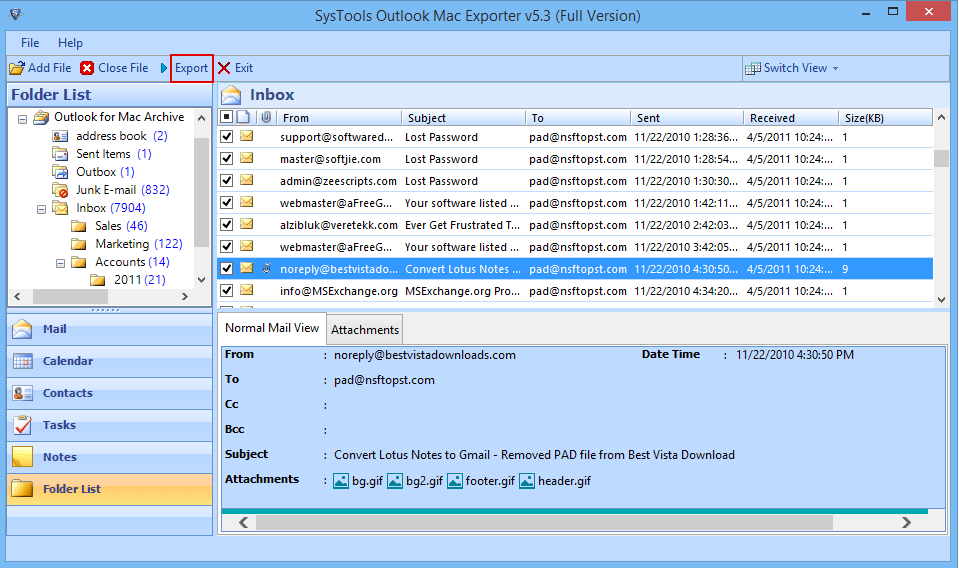
- Select the mails which you want to export and hit the Export option by right clicking the mouse.

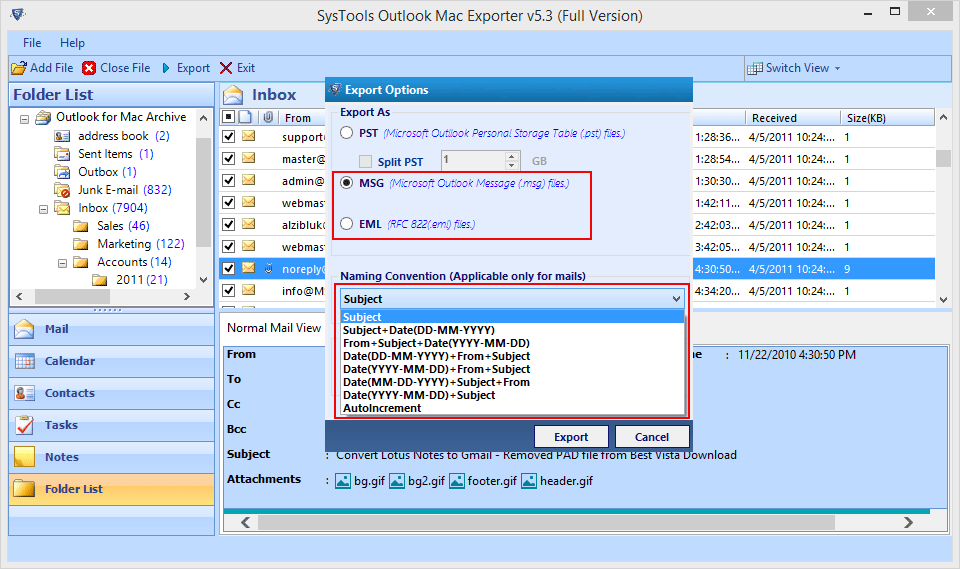
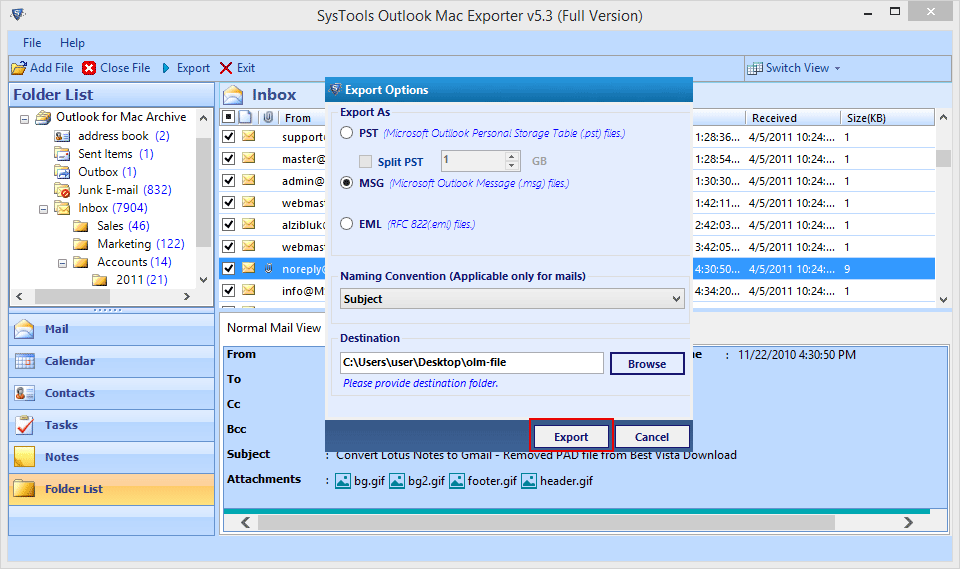
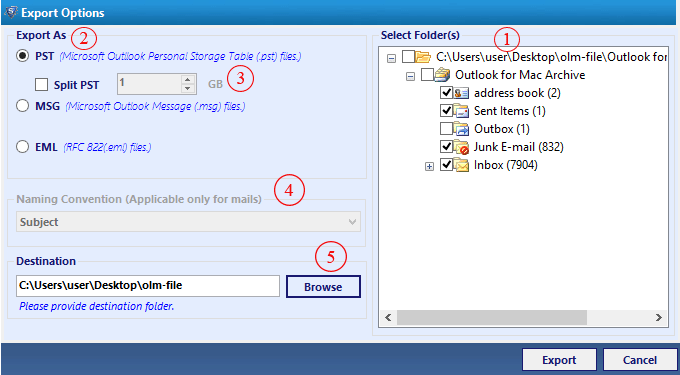
- From given Export Options select the format in which you want to export your file. Click on PST and there is Split PST option to break the large files.

- To export olm into EML/MSG, select the desirable naming conventions in which you want save your emails.
- Browse the path and folder for saving the exported file and click on Export.
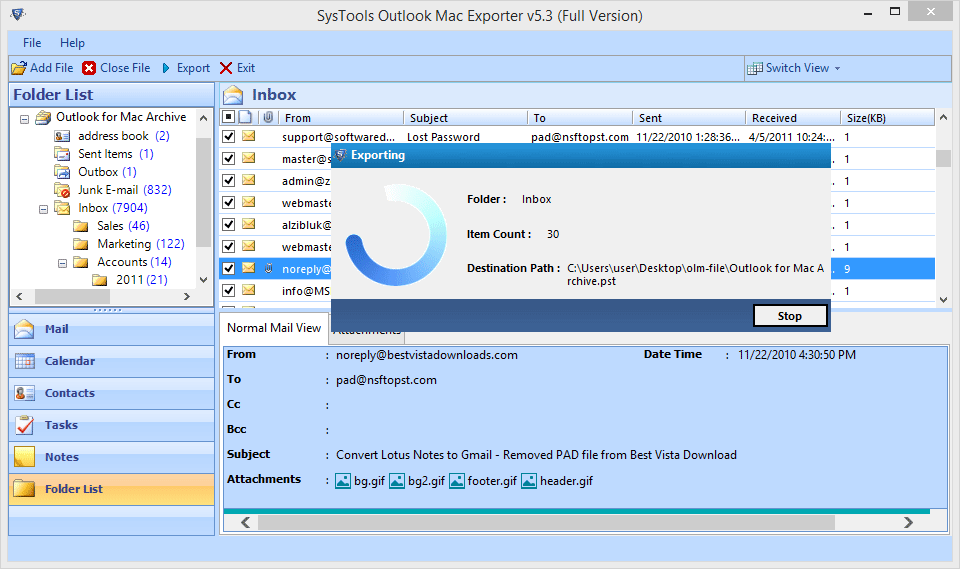
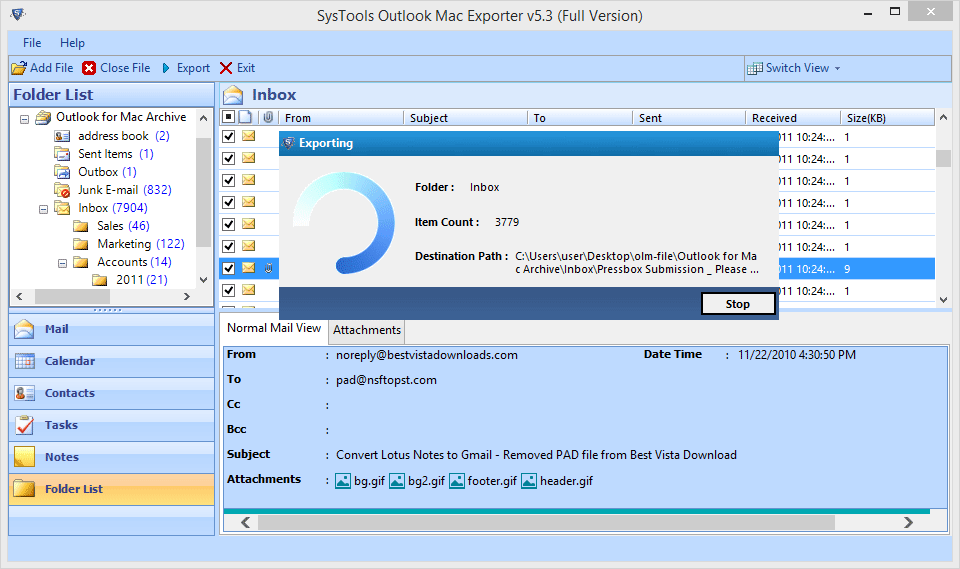
- Exporting progress will be seen with details of folder name, item counts and Destination path.
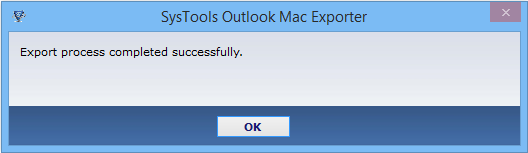
- A message will be displayed by the software after successful export.
- An Export Report will be auto generated after complete exporting of file.
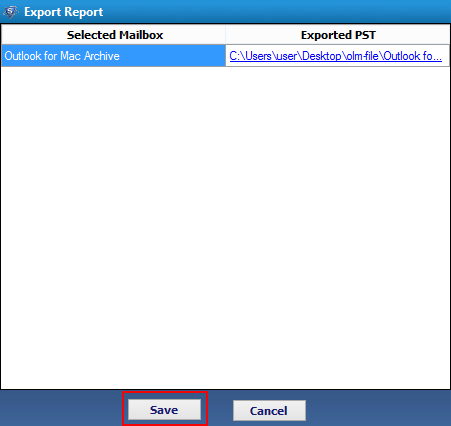
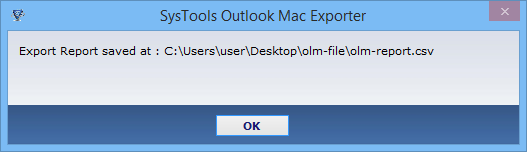
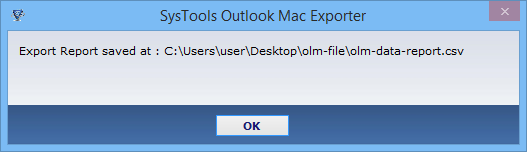
- This report can be saved at any location in your machine. For saving, click on save.

- A small screen appears showing the location of saved Export report. Click on OK.
- Conversion of Selected Folder
For complete conversion of selected folder, click on Export button from header menu.
- Now select the folder from right side of screen and select the Export Options. For EML/MSG format select the naming convention. After selecting Export Option locate the path for saving exported file. Click on Export.
- The software displays the Export progress with folder name, item counts and location of folder.
- Report generated by tool can be saved by clicking on Save.

- Export Report saved location will be displayed by tool.
- Check the Exported file at the saved location in your machine.
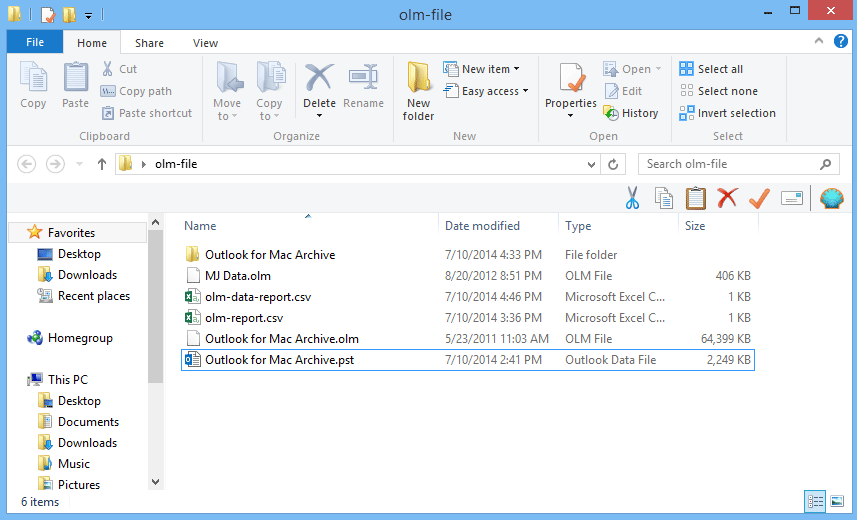
- Open the PST file in MS Outlook and find your data here.